Landscaping Ideas & Gardening Tips
Lawn Care Equipment & Gardening Products
|
Landscaping Home >> Landscaping Articles >> Summer Heathers
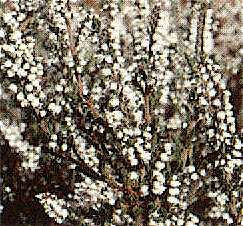
Summer Heathers Heathers are low-growing, shrub-like perennials that blossom into a sea of color. They look great planted with dwarf conifers, especially when a variety of shapes, colors and textures are used. Interplant late flowering varieties with deciduous plants that have colorful foliage in the fall for a striking display, and use them in camellia and rhododendron beds to add summer color. They are also used in rock gardens and as groundcovers.
Heathers enjoy an sunny site with good air circulation and an acid soil that doesn't dry out or become waterlogged. Acid soil is a must for summer heathers, and if your pH is too high, you should amend with aluminum sulfate before planting if necessary. Pale leaves and slow growth indicate that the soil is not acid enough. You can help the soil retain moisture in the heat of summer by applying a mulch. Two inches of bark chips or cocoa shells make a good mulch for a bed of heathers.
Care and Maintenance Use a fertilizer designed for acid-loving plants in spring and at regular intervals through the growing season as the package directs. It's best to use a soluble fertilizer rather than one that has to be worked into the soil because the roots are very shallow, and you can easily damage them by trying to cultivate around the plants. To encourage strong growth, shear off the plants in early spring before flowering begins.
Heathers are susceptible to fungus, and if your summers are hot and humid, you may want to have a fungicide on hand so you can treat your plants at the first sign of infection.
Taking Cuttings The best time to propagate heathers is mid- to late summer. Fill a pot with a mixture of half sand and half sterile peat moss, and make holes for your cuttings with a thin twig.
Clip a 1-1/2 inch piece from the tip of a non-flowering shoot. Make sure the shoot is from the current season's growth. Strip the foliage from the lower half of the stem with your fingers, taking care not to damage the stem, and dip the lower end of the stem in rooting hormone. Make sure the rooting hormone covers the part of the stem where you have removed the foliage, then tap gently to remove the excess. Place the cuttings in the holes that you have prepared and water the pot thoroughly but gently so as not to disturb the cuttings. Once the pot has drained, cover it with a plastic bag, making sure the sides of the bag don't touch your plants. If necessary, insert a few twigs in the soil to hold the bag away from the plants. Leave the bag in place for 6-8 weeks.
About the Author:
|
Attention all gardeners and landscaping professionals...
Click here to see how you can greatly increase your business, visibility, and advertising ROI...
| |